Table of Contents
Introduction
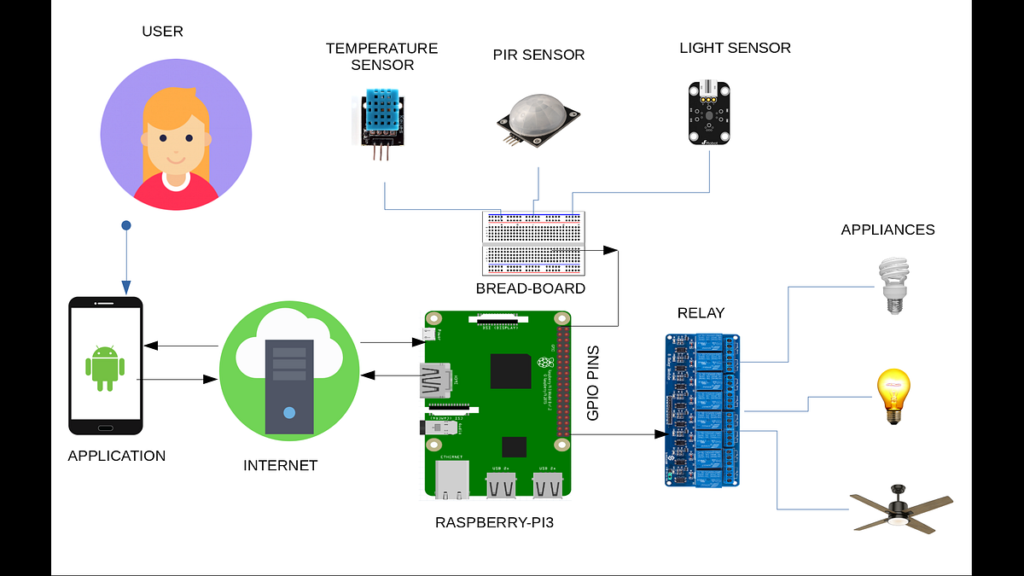
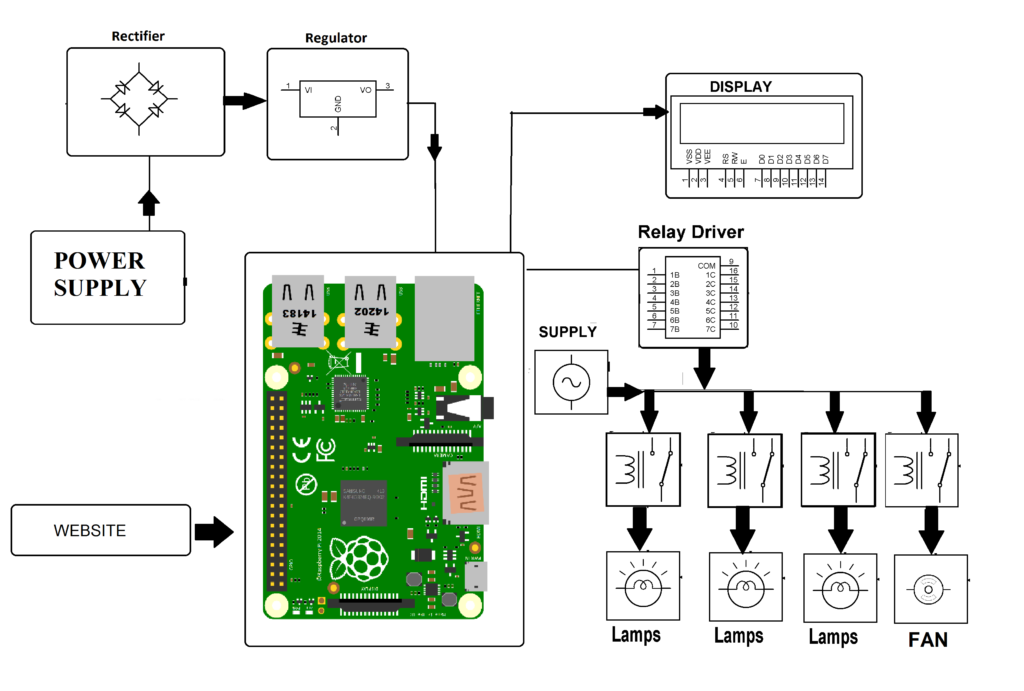
In this era of technological advancement, setting up a home automation system using Raspberry Pi offers an exciting opportunity to enhance convenience and efficiency in your daily life. By integrating various smart devices and appliances, you can create a seamless and customizable environment tailored to your preferences. This guide will walk you through the steps to set up a home-automation system using Raspberry Pi, empowering you to transform your living space into a smart home.
Choose a Home Automation System
When selecting a home automation system for your Raspberry Pi, consider various factors such as:
- Compatibility: Ensure that the system you choose is compatible with Raspberry Pi. Check the system requirements and supported hardware list to avoid compatibility issues.
- Ease of Use: Look for a user-friendly interface that makes it easy to set up and configure your smart home devices. Consider the availability of documentation and community support for assistance.
- Features: Evaluate the features offered by different home automation systems. Determine whether they meet your specific needs and requirements, such as support for voice control, integration with third-party services, or advanced automation capabilities.
- Scalability: Choose a system that can scale with your needs as your smart home grows. Consider whether the system supports adding new devices and expanding functionality without significant limitations.
- Cost: Take into account the cost of the home-automation system, including any additional hardware or subscriptions required. Compare pricing plans and features to find the best value for your budget.
By carefully considering these factors, you can select the right home automation system that aligns with your preferences and goals for your smart home setup.
Install the Operating System
To install the operating system for your home automation system on Raspberry Pi, follow these steps:
- Download the System Image: Visit the official website of the chosen home automation system and download the latest system image compatible with Raspberry Pi.
- Prepare the SD Card: Use a tool like Etcher to flash the system image onto an SD card. Ensure that the SD card has sufficient storage capacity and is formatted correctly.
- Insert the SD Card: Insert the SD card into the Raspberry Pi’s card slot, ensuring a secure connection.
- Connect Power and Display: Connect the Raspberry Pi to a power source using a compatible power adapter. If necessary, connect a display monitor and keyboard for initial setup.
- Boot the Raspberry Pi: Power on the Raspberry Pi, and the system will boot from the SD card. Follow the on-screen prompts to complete the installation process, including configuring network settings and setting up user accounts.
Once the operating system is successfully installed, you can proceed to configure the home automation system according to your preferences.
Connect Devices
To connect your smart devices to the home automation system on Raspberry Pi, follow these steps:
- Identify Compatible Devices: Check the compatibility of your smart devices with the chosen home automation system. Ensure that they support integration via protocols like MQTT or have official plugins or extensions available.
- Install Firmware (if necessary): Some smart devices may require installing custom firmware to enable local control and integration with the home automation system. Follow the manufacturer’s instructions to install the firmware securely.
- Pair Devices with the System: Use the web interface or smartphone application provided by the home automation system to pair your smart devices. Follow the on-screen instructions to establish a connection between the devices and the Raspberry Pi.
- Configure Device Settings: Once the devices are connected, configure their settings within the home automation system. Customize device names, assign rooms or zones, and set up automation rules as needed.
By connecting your smart devices to the home automation system, you can centralize control and management, allowing for seamless integration and automation of your smart home environment.

Set Up Controls
Setting up controls for your smart home devices using the home automation system involves the following steps:
- Create Automation Rules: Define automation rules to control your devices based on triggers such as time, sensor data, or user interactions. Use the visual interface provided by the home automation system to create rules and workflows tailored to your preferences.
- Configure User Interfaces: Customize the web interface or smartphone application to access and control your smart home devices conveniently. Organize controls into rooms or zones, create widgets or shortcuts for frequently used devices, and personalize the interface to suit your preferences.
- Integrate Voice Control (if supported): If the home automation system supports voice control, integrate it with voice assistants like Amazon Alexa or Google Assistant. Configure voice commands to control devices, execute automation routines, and retrieve status updates hands-free.
- Set Up Remote Access (optional): Enable remote access to your smart home system, allowing you to control devices from anywhere with an internet connection. Configure secure remote access settings, such as VPN or cloud-based services, to ensure privacy and data security.
By setting up controls for your smart home devices, you can streamline operations, automate routine tasks, and enhance convenience and comfort in your living space.

Test and Troubleshoot
Testing and troubleshooting your home automation system ensures its reliability and functionality. Follow these steps:
- Perform Functionality Tests: Test each smart device and automation rule to ensure they function as intended. Verify that devices respond to commands, automation routines trigger correctly, and sensor data is accurate.
- Monitor System Performance: Monitor the performance of your home automation system over time. Check for any errors or anomalies in device status, network connectivity, or system resources that may indicate potential issues.
- Troubleshoot Problems: If you encounter any problems or malfunctions, troubleshoot them systematically. Check device connections, software configurations, and network settings to identify and resolve the root cause of the issue.
- Update Software and Firmware: Keep your home automation system up to date by installing software updates and firmware upgrades regularly. Check for updates from the system’s developers or community forums to ensure compatibility and security.
By testing and troubleshooting your home automation system regularly, you can ensure its reliability and stability, minimizing disruptions and maximizing the benefits of your smart home setup.
Expand and Customize
Expanding and customizing your home automation system allows you to tailor it to your evolving needs and preferences. Consider the following strategies:
- Add New Devices: Expand your smart home ecosystem by adding new devices and sensors compatible with your home automation system. Explore options such as smart lights, thermostats, door locks, or security cameras to enhance functionality and convenience.
- Integrate Third-Party Services: Integrate your home automation system with third-party services and platforms to extend its capabilities. Connect to smart home ecosystems like Apple HomeKit or Samsung SmartThings, or integrate with online services like IFTTT (If This, Then That) to create advanced automation scenarios.
- Create Custom Automation Routines: Develop custom automation routines and scripts to automate specific tasks or respond to unique scenarios in your smart home. Utilize scripting languages like Python or automation tools provided by the home automation system to create custom workflows tailored to your needs.
- Personalize User Experience: Customize the user experience of your home automation system to align with your preferences and lifestyle. Adjust settings such as device names, room layouts, and user permissions to create a personalized and intuitive interface for controlling your smart home.
By expanding and customizing your home automation system, you can unlock new possibilities for automation, efficiency, and convenience, transforming your living space into a truly smart home environment.
Conclusion
Setting up a home automation system using Raspberry Pi offers a convenient and customizable solution to enhance your living space. By following the steps outlined in this guide, you can create a smart home environment tailored to your preferences, enabling greater convenience, efficiency, and control over your connected devices.
FAQs
Is Raspberry Pi suitable for home automation projects?
Yes, Raspberry Pi is a versatile platform that can be used for a wide range of home automation projects, offering flexibility and customization options.
What are some popular home automation systems compatible with Raspberry Pi?
Some popular home automation systems compatible with Raspberry Pi include openHAB, Home Assistant, and Domoticz.
Can I control my smart home remotely using Raspberry Pi?
Yes, many home automation systems for Raspberry Pi offer remote access capabilities, allowing you to control your smart home devices from anywhere with an internet connection.
Are there any limitations to setting up a home automation system with Raspberry Pi?
While Raspberry Pi offers great flexibility, it may have limitations in terms of processing power and memory for complex automation tasks or handling a large number of devices simultaneously.
How can I ensure the security of my home automation system built with Raspberry Pi?
To enhance security, ensure that you regularly update the software on your Raspberry Pi and connected devices, use strong passwords, and implement encryption where possible.


